Pages

To Capturing Life...

Did you just get your new camera? Do you want to make the leap from snapping photos to making arts? Then I invite you to take that journey with me, an artistically challenged guy who enjoys capturing life's moments with a pound of technology and an ounce of creativity. I hope my site can ignite your spark of imagination. Let's record the light of our lives together!

Tuesday, May 31, 2011

The Lens of My Dream: Canon EF 70-200 F4L IS

Many people have been suggesting more photos! I thought that was awesome suggestion. So here it goes right off the bat =) (I ended the post with a bunch of shots as well, don't forget to check it out!)


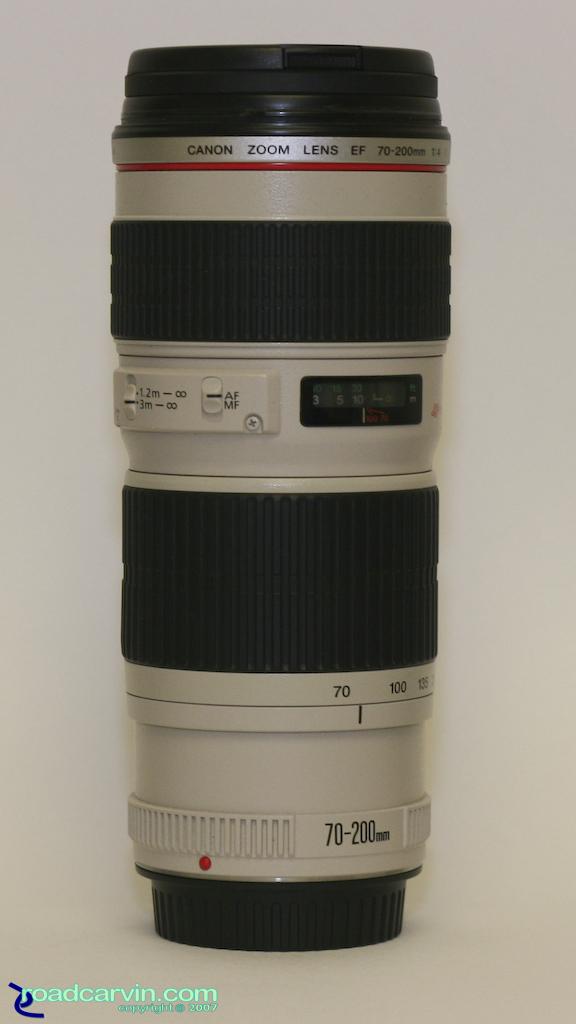
After 8 hours of out shooting over 2 days, I finally got some decent photos that I am not ashamed of showing out of my new baby - Canon EF 70-200 F4L IS. Here are some of my initial impressions of this lens!

How/Why I've got it
Now I've been lusting over this lens for almost a year. I always felt inadequate on the longer focal length with both my kit lens (18-55) as well as my 50/1.8 prime. I considered several options to compensate for that missing range:
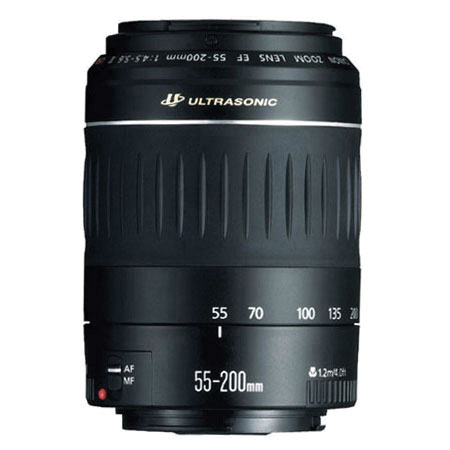
1) Canon EF 55-200 F4-5.6 IS               2) Canon EF 70-300 IS USM         3) Canon EF 70-200 F4L


I bought this lens used off of bccamera forum after careful considerations (which can be a whole other post), and decided I would get this as a little treat to myself for getting into medical school.

Condition of the Lens
Since I bought this lens used, I thought I'd comment on the condition. The lens was date coded UW = manufactured in 2008. The seller bought both a nikon and a canon system and decided to stick with nikon. He hardly used this lens at all. It was brand new, wrapped in original packaging and came with all original receipt and warranty. Not a single scratch on the glass or barrel (not a single peck of dust on the glass). Lens was essentially in perfect condition.

3 Reasons I Fell in Love with This Lens:


Colour
This is the main reason why I fell in love with this lens. The very first thing I noticed ever since the tests shots is how vibrant and lively the colour is. All of the shots below are NOT photoshoped originals. The ability of this lens to see those vibrant colours are really making me look pro even I simply pointed and shooted some of the shots. I especially loved the skin tone rendering on this lens (maybe it's those girls' good make up), it does starting to look like some of the professional wedding photography (minus the creative skills on my part of course =P)


Bokeh
Bokeh is the next best thing I felt with this lens. As soon as I took it outside and started shooting, I noticed how incredibly smooth and pleasing those bokehs are! For those of you who don't know, bokeh refers to the out of focus region (ie. the blur region) of a photograph. As shown in the top left photo, the out of focus area is so fantastically rendered that it makes me not want to look at in-focus objects... The shape of the bokeh (see above for the maple leaf photo) is very pleasingly round due to the whopping 8-blades aperture (compared to my 5-blade aperture on 50mm/1.8 - a pentagon shaped bokeh if you look closely at photos from before).


Sharpness
And finally, the sharpeness. This lens is arguably the sharpest lens in the entire Canon EF telephoto zoom collection. the image remains sharp even at 100% crop (full size picture, not shown here). Both of the pictures below are taken at 200mm, and as you can see the telephoto end is incredibly sharp even when hand-held (all photos here are hand-held, IS assisted). The Vancouver skyline is taken on the mountain of QE park, so you Vancouverites can figure out the distance... As you can see from previous pictures, this lens really gives you the sharpness you want in the area you focus on.


Some Mechanics (USM Focus, IS)
When I was doing my homework and decide if I wanted to pay 500 dollars on IS, I had no idea that it could be SO useful. Now that I got the IS version, I thought that was money well spent. As an amateur who does photography to capture life's moments, I do NOT bring my tripod around. Most of my photos are taken hand-held. The IS on this lens worked like a charm for me. I can see the drastic effect right in the view finder as the image stopped moving as soon as I half-press my shutter. I tried turning the IS off at the 200mm end, I observed significant amount of shaking in the view finder. While it may be OK with shutter speed >1/100, but as soon as you go down to 1/50, 1/20, the shake becomes obvious and detrimental. With the aperture only goes down to F4, I would HIGHLY recommend the IS feature, not to mention the IS version is optically a different lens compared to the non-IS version as this one is essentially remade ~10 years later.

The USM focusing on this lens is superb. My dad could not get over how quiet, fast, and accurate this lens focus. The lens literally snap into focus as soon as the shutter is half pressed with none of those mechanical clank clank focusing business going on.

Macro
I use this lens sometimes to dub as a macro lens due to the ability to show finest details as well as a shallow depth of field.

Challenges
The foremost challenge I have with this lens currently is the sudden change of mentality when taking photos. With it's fabulous zoom, I suddenly lost the privilege to be immersed in the photo that I'm taking. Many times my photos look detached, distant, and with no central theme. This will definitely take some time to get used to, as it did for my 50mm prime.

All in all, I am extremely happy with this lens and am looking forward to shoot more with it!

More Shots with 70-200mm F4L IS


Focal Length Showcase at 70,100, 135, 200mm


Tuesday, May 03, 2011

Photo Shoots + Calling for More Models! =)

And so I just completed my first ever photo shoots!  It was for a couple who have dated for quite a while. I am friends with them both which made the communication quite natural and hopefully put them at ease. We shot after lunch hour till around 4PM at Stanley Park, Vancouver, mainly beside the rose garden. For those of you unfamiliar, Stanley park is one the biggest parks in Vancouver, immediately adjacent to the downtown core. I just sent them the photos for them to preview and they both loved them very much and I got a lot of thanks for that!

So on the side of giving the rundown of this photo shoot, I just want to call out for more models - single or couple! Whether you need it for memories or professional purposes (job hunting), or even just some fun, I'm all here for you! I'm basically giving photo shoot session + ALL of the shots I took for free. All I ask for is this learning experience for me, give me a shout out if you liked the photos, and maybe supporting me by giving me permission to post the photos on website (you absolutely do NOT have to, and you can sue me if I did it against your permission LOL!)

Now, onwards with the juice of this post!

The Details

Location: Stanley Park, Vancouver
Weather: Gorgeous sunny day with some clouds.
Time: Afternoon, Late April
Equipment: Canon 550D (T2i) with Canon 50mm F1.8 prime lens + Vivitar Soft Filter for some shots.
Subjects: Dating couple

Some Lessons Learnt

1. Aperture
I shot with a 50mm prime throughout, primarily using large aperture for nice bokeh (blurring effect). However, since it is for 2 people, I used mostly F3.2 just so we get both people in focus.

2. Getting the "Natural" Look
I am friends with both of the couples so I did not have trouble communicating ideas at all. The girl was very natural at posing while the guy started out slightly awkward (a common thing you will find when shooting couples I suspect). To overcome that, I usually give them a pose that I want them to try out, and give them a few minutes to settle in. At this point, I will tell them I will take a few shots. After a few shots, I will look down on my camera while they talked. But what I'm REALLY looking for was not the pictures I just took, but them. Usually this is the moment they are most natural and unsuspecting. Sneaking a few shots during this time is great if you didn't get the result you wanted during the first time.

3. Lighting
I used mainly back lit lighting as the scattered light gives off smooth and well defined features on their faces. For girls, it really shows off the smooth skin and pretty features.

4. Dealing with Imperfections
The girl had very nice skin, with 1 pimple that she was concerned about. I attached a smooth filter to deal with that. However, while it DID work on giving the skin and background grass a better look, it did NOT remove the pimple at all. As a result, I removed it in post-production which worked out like a charm (easy and effective). Having some makeup (foundations/cover ups) with me in the future may not be a bad idea!

5. Showing your Results
There's nothing more important than getting instant feed back from your models - after all, they are your star. I found showing them the photos you took is a very effective way to do this, especially with modern dSLR. It definitely keeps them excited and interested because now they know they will look nice in your photos and they want more!

Things I Need Improvement On


1. Poses
One of the biggest challenges I had was coming up with poses for the couple to try out. I was glad that I had an album with some sample poses I downloaded off of internet on my cell phone. Some poses worked, some did not. I think what I need are eyes that will spot out beauty (in terms of poses) and brain that will be able to come up with styles I want.

As a result, I will be learning more about the BASICS on what works and what does not in a pose for portrait. eg. how can I show the intimacy? How do I show off girl's waist line? etc etc.

2. Intentional Incorporation of Scene
Second most important thing is probably how to better incorporate the model into a scene in a very intentional way. ie. creating a very lively shot with smiling couples, active poses amidst colourful flowers; showing a passionate, intimate couple with a very simple, deserted scene emphasizing on their love requires nothing but each other. etc etc.

3. Diverse Use of Lighting
Lastly, I want to try incorporate more uses of lighting including back lit fill, side light or direct sunlight. I really think that will take my shots to a new level.


I think that's all for now! Now I challenge YOU to do the same! Take some photos for YOUR friend. It will not only benefit you as a photographer, but also leaving your friends a happier person/couple.